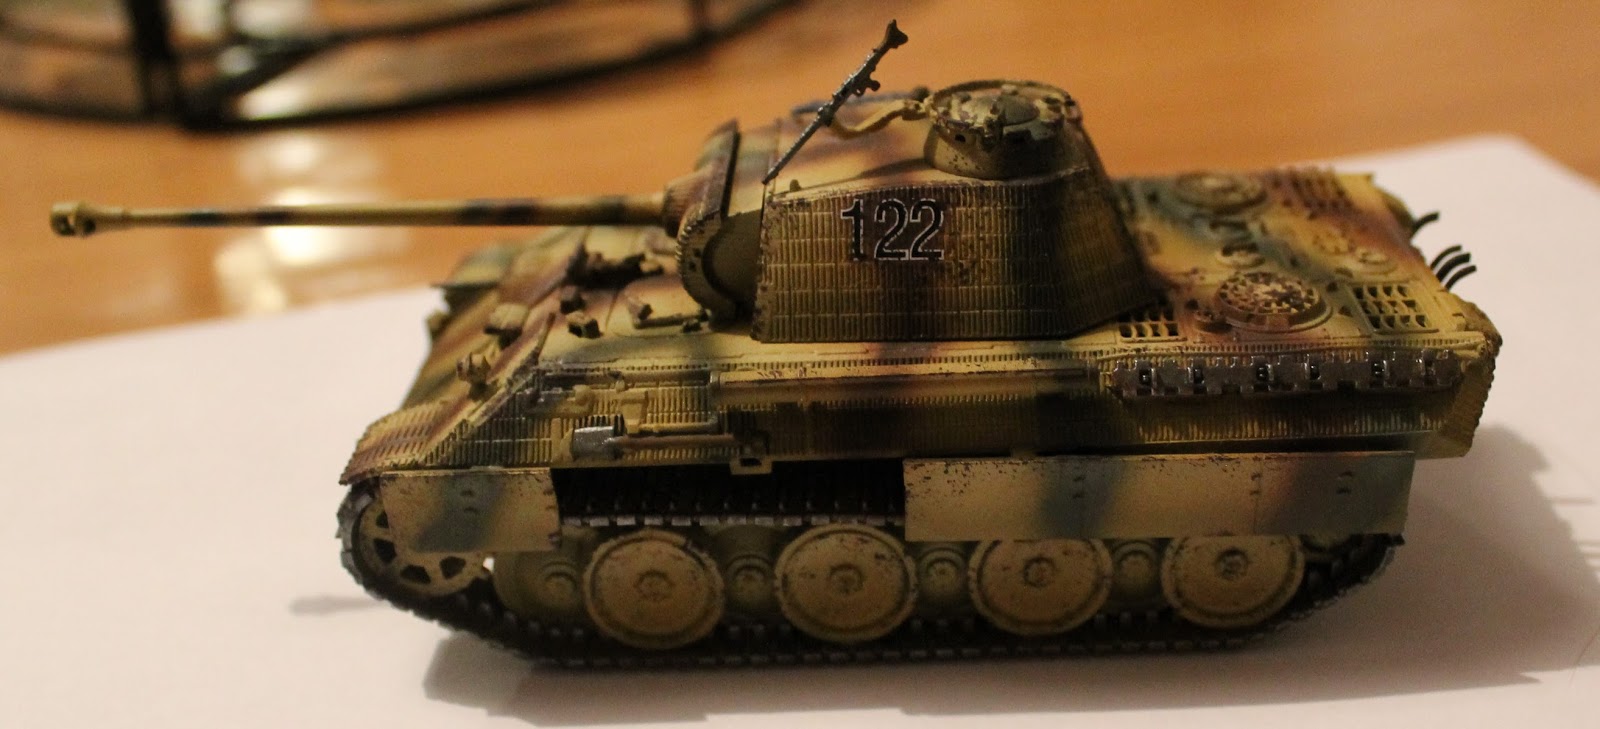
At the end of the last article we had two tanks that were colour modulated and camouflaged. Now we need to finish painting it and do some weathering on it to create a more realistic finish. First we need to paint the tracks; I used AK Interactive's 'Rusty Tracks' (though any dark reddish brown would do) and then drybrushed this with Gunmetal from Vallejo. I then painted the tools, machine guns and stowage. As this is a very late war force I painted some of the road wheels in red oxide; the colour that German vehicles were primed with before painting. This gives the impression that replacement parts have been used but that these had not been painted due to time or lack of materials. I also added transfers at this stage, this was the end result, as you can see the modulation has been toned down slightly by the camo.


Another good technique used by scale modellers is paint chipping. This simulates the wear and tear on paintwork that daily use of the vehicle would create and is very easy to do using a piece of sponge, for example from a blister pack. Rip off a piece, dip it in some thinned paint and then dab it onto the sections of the tank that would see the most amount of wear, for example the crew hatches and any edges. It's important to build the effect up slowly and stop every so often to assess how it looks. Don't overdo it though as it will begin to look unrealistic. A way of enhancing this is to apply a thin line of the original paint mixed with white to the edge of some of the chips. This can be quite a time consuming process though. After this is done we can then move onto further weathering using oil paints which will involve using white spirit; a paint stripper. In order to prevent all of our previous hard work being undone we need to give the vehicle a coat of varnish. I've found gloss is best as it enables the oil paint to flow better. If you can apply a few coats this will protect the model better; I've found an airbrush again makes this easy to do.


Once the varnish has dried (best to leave it overnight) you can apply the oils. These work well for weathering as once they have dried they can be manipulated to create very realistic effects such as streaked dirt, rust and soot. You can either buy oil paints from an art shop (lamp black and burnt umber are good ones to pick up for general weathering) and thin them with white spirit or companies like AK interactive carry a dedicated range of weathering enamel paints that are the perfect consistency. Apply the brown and black into any crevasses and contours on the tank and then leave it to dry, usually about an hour or so.


Then take a cloth and wipe all over the tank to remove the majority of the oil from the raised sections. If you also take a brush (a drybrush works well) and dip it in a little white spirit you can then drag this down the various panels in order to create the effect of dirt being streaked down them by rain and moisture. Once this is done you can apply another coat of matt varnish which will seal in the oils and stop them being wiped away during handling and stop the tanks looking shiny.

A final effect I wanted to add was some realistic mud on the tracks of the tank. After researching techniques I found one using the airbrush which created a realistic spattering effect. To ease the process I picked up AK interactives 'very muddy' set which includes various mud colours and also plaster and pigment powders that can be mixed in with them to make a thicker paste. However you can easily do the same using some brown paint thinned and mixed with water. Basically load an old brush up with paint and then spray the air from the airbrush over it to spatter the colour onto the tracks and running gear. I think you could also easily do this by flicking the brush to spatter the paint too.
There you have it, a realistic looking tank that looks like it's seemed some action!


No comments:
Post a Comment